STEP-BY-STEP GUIDES
Think of this as a curated guide to all the tips and resources I wish I'd read/watched before I embroidered for the first time! It links to some YouTube tutorials from other artists and creators, and is designed to give you the best intro into completing your first embroidery piece.

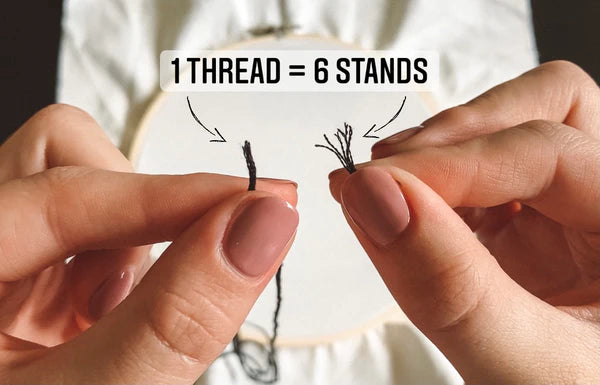
Pulling Thread Apart
Each thread has 6 individual strands, that can be pulled apart to embroider with. The best way to pull these apart is to seperate them at the end, hold onto one strand, and slide the other strands off. Trying to do this with more than one strand at a time never works for me!

How to Thread Your Needle
I always recommend this YouTube Tutorial by Thread Unravelled to show and explain threads and how to thread your needle for embroidery.

How Many Strands to Use
The instructions will state how many strands each stitch is meant to use for the given design. Different amounts of strands will create different textures.
As you can see to the left, there are 2 different ways to do 2 (and 4 and 6) strands. You can either pull the strands all the way through so they are completely in half, and tie all the strands at the end.
Or, the more common embroidery technique, is to pull the strands just through, and put a knot in only in the end of half the strands. When using this technique, pinch the needle at the eye when pulling it through the fabric, so that the strands don't pull back through.
Neither technique is wrong, just personal preference!

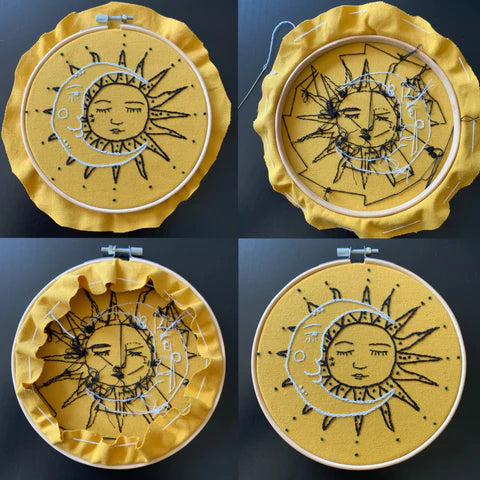
Mount & Tighten Fabric to Embroidery Hoop
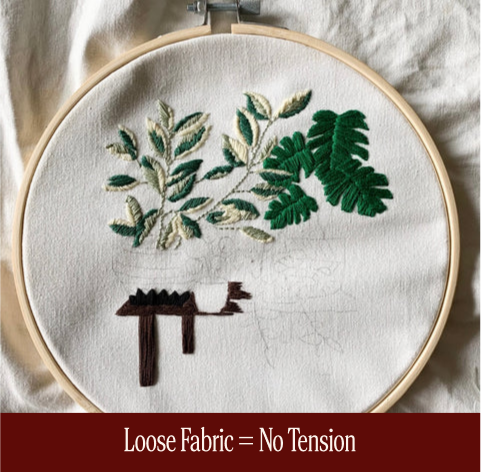
Fabric Tension is Everything!
Maintaining fabric tension while embroidering is key to a smooth design - and also makes it much easier to embroider. In the image on the left is what loose fabric looks like in the hoop, you can see the shadows and the fabric moves a lot while you embroider.
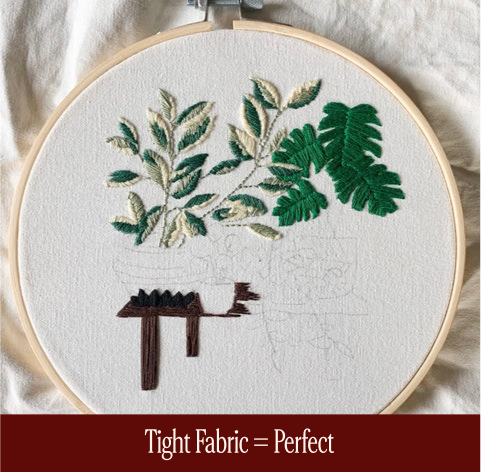
This Is How You Fix It
Tighten the screw up the top of the hoop, and pull the excess fabric through the hoop. When pulling the fabric through, I find it works best when you start on one side, gently pull some fabric through, then move your way slowly around the hoop until you can't see any more buckling in the fabric. Another way to check and know your fabric is tight enough - if you tap it, it should sound kind of like a drum!

Wash off the Blue Pattern
Once you have finished embroidering, take the embroidery out of the hoop (the hoop could get stained by the blue ink otherwise) and wash under a tap with cold or warm water. You may need to rub some of the blue off with your finger tips - if it is really stubborn you can use soap! It should all wash away in 2 or 3 minutes.
Hang it out to dry in a safe and clean space to dry.
NOTE: if there is a blue tinge once dried after you have washed the blue pattern away, just wash again with some soap until gone.
Once dried, mount the fabric back onto the hoop and trim the excess fabric.
How to 'Back a Hoop'
Once you have completed your embroidery art, you can choose to frame it or keep it in the embroidery hoop for display! Below are steps on how to back the hoop so it can be displayed in the embroidery hoop.
- Cut the excess fabric around the hoop, but leave a good amount of fabric to work with as shown below.
- Using some leftover thread, do a loose running stitch around the outside of this excess fabric.
- Pull the thread tight so that the excess material collapses inwards like shown below.
- Tie off the string, and hang on a wall! You can use a hook to hang them up and tie a string to the top of the hoop, or blue-tack works just as well.
Using Needle Threaders
Once you have separated your thread and have the correct number of strands, use the needle threaders provided to thread the needle! (Note, if you are threading 6 strands at once, it may take some wiggling to pull through)

Step 1

Step 2

Step 3

Time to Meet The Stitches
It can be very difficult to learn a new stitch just from a diagram, videos are the best answer to that!
This YouTube Tutorial by LoveCrafts is brilliant for explaining the top 10 embroidery stitches.
Our Stitches Diagram

Backstitch
Creates a neat, continuous line for outlines and detail. Bring the needle up, take a small stitch back to the previous point, then bring it up ahead on the line and repeat.

Stem Stitch
Makes a rope-like line perfect for stems and curves. Work short diagonal stitches, always keeping the thread on the same side; bring the needle up halfway along the previous stitch to form the twist.

Long & Short Stitch
Ideal for filling larger areas and blending colour. Alternate long and short stitches in the first row, then fill the gaps with opposite lengths in following rows, keeping stitch direction consistent.

Satin Stitch
Smooth, glossy fill for leaves and shapes. Lay tight, parallel stitches side by side across the shape (often vertically for leaves), maintaining even tension for full coverage without gaps.

Chain Stitch
Linked loops that form a decorative line, great for stems. Insert the needle back into the same hole to make a loop, bring it up slightly ahead through the loop, tighten, and repeat; anchor the last loop.

Lazy Daisy Stitch
Detached chain petals/leaves, simple and pretty. Come up at the centre, reinsert in the same hole to form a loop, come up at the tip catching the loop, adjust, then secure with a tiny tack stitch.

Wagon Wheel Stitch (Cobweb Rose Stitch)
A woven rose built over spokes. Make five evenly spaced straight stitches as spokes, then weave over–under around them until covered; tuck the thread under the edge of the weaving to finish.

Cartwheel Stitch (Buttonhole Stitch)
A circular flower with a scalloped edge. Work looping stitches around a circle, anchoring each near the centre and catching the previous loop; slip the final stitch under the first to close neatly.

French Knot
A tiny raised dot for texture. Wrap the thread once or twice around the needle, insert close to where you came up, hold the working thread taut, and pull through slowly to form a neat knot.

Australian Owned
Join a community of 30,000+ makers! With many 5-star reviews, you’ll be in great company as you create your masterpiece.

Easy Kits + Guides
No experience? No problem! Each kit includes everything you need and step-by-step instructions.

Free shipping on $80+
Enjoy complimentary shipping on all orders exceeding $80!

Easy Returns
Enjoy easy returns! If unsatisfied, return within 30 days .